Posts

Showing posts from December, 2020

Auto Backup Setup Help Guide

Image
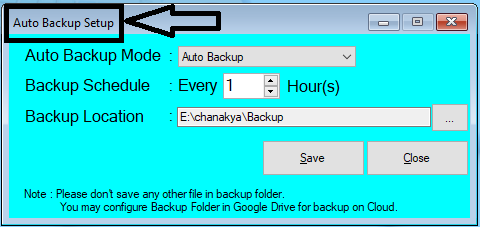
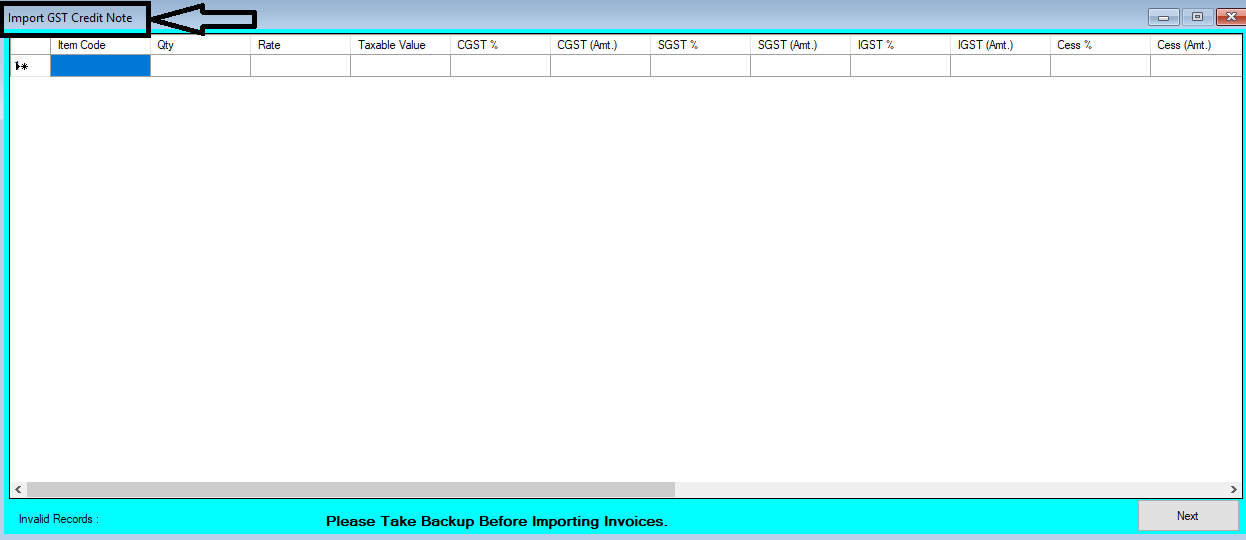
How to Take Auto Backup and Backup on Logout of Data in Chanakya ERP Auto Backup Setup Click on  Auto Backup Setup  in  Tools Menu  to open Auto Backup Setup option (as shown in below image) Click on Drop-Down Menu beside Auto Backup mode and select Auto Backup option in the list and then  Select Backup Schedule ( Specify Hour, so that software could take backup automatic according to specified Hour ) Click on the Three Dots (...) beside backup location to Select/Browse File from your system, where you can Save Backup File , as shown in below image Click on Save button to save the changes.  Backup on Logout   Click on  Auto Backup Setup  in  Tools Menu  to open Auto Backup Setup option (as shown in below image) Click   on   Drop-Down Menu   beside   Auto Backup mode   and select   Backup on Logout   option   in the list and   Select Backup Schedule  will be Off/Disable in this case, so no need to click on it, as shown in below image Select Backup on Logout option and the Cli

Item Ledger Help Guide

Image
How to Check Item Ledger in Chanakya ERP Item Ledger (All Items) Click on  Item Ledger  in  Reports Menu  to open Item Ledger option (as shown in below image) By default All Item will be selected, if you want to see all Item Ledger at one Time then Click on show Button, you can also filter according to Date-wise (Between Two Date)  as shown in below image. All item ledger will be displayed at one time in a single window, you can scroll down and check all the items, as shown in below image Search Item at Left Bottom Corner of the window, where you can Search Particular items ledger, which will be indicated through Blue color , you can also Press Enter Key to Go To Next item of same name in the list, as shown in below image Click "F12" on Particular Item, a Pop-up Window will open on same screen in which you will get all details ledger of particular items, you can View Ledger according to date-wise ( Between Any Two-date ), as shown in below image Item Ledger c

Export Reports in Multiple Formats and Email Attachment Help Guide

Image
How to Export any printable document or Reports to any other formats from Chanakya ERP 

Trial Balance Help Guide

Image
How to Check Trial Balance in Chanakya ERP

Manage Item Opening Help Guide

Image
How to Manage Item Opening Single/Bulk in Chanakya ERP Manage Item Opening Single Entry Click on  Manage Item Opening  in  Master Menu  to open Manage opening Entry Type option (as shown in below image) Click  on Single Entry module to Open Manage Opening( Single Entry ), as shown in below image Press  " F12"  key beside Select Item and a Pop-Up Window will open on screen with all the Item Entry done at  Item Master   as shown in below image Select the item and Press Enter Key to open the item details and Enter the Opening stock of item and Click on Add button, as shown in below image After successful addition of Opening Stock, one message will display on window,Press Enter Key or Click on Yes button to proceed further, as shown in below image After entry of opening stock, your item will be Visible in blank area of window, as shown in below image Added Opening Stock of all Item will be visible here,while Single entry addition (as shown in below image) Manage Item Open

Download Master (Only For Medicine) From Chanakya Server Help Guide

Image
How to Download Master Data (Medicine) Through Chanakya Server in Chanakya ERP Download Master Data (Only for Medicine) Click on  Download Master from Chanakya  in  Master Menu  to open Download Master from Chanakya option (as shown in below image) Select Medicine Brand according to your Distributorship/Retailer or Business, as shown in below image Click on Next Button to move to Second Step , while Moving to next Step the selected Brand Medicine will take Few Seconds to Download , as shown in below image View the Downloaded Medicine of Selected Brand with MRP and Units, as shown in below image. Click on Save button to save the data in Item Master , as shown in below image  NOTE:- This feature is only available for Medicine C&F, Distributor, Retailer, ETC. For More Query/Support, Feel free to Generate Ticket or Call us on +91 8447740155 Thank You !

Import GST Credit Note Help Guide

Image
How to Import GST Credit Note Through Excel in Chanakya ERP Import GST Credit Note  Click on  Import GST Credit Note in  Master Menu  to open Import GST Credit Note option (as shown in below image) GST Credit Note Maintained in  Excel  could be easily transferred through   "Copy and Paste"  option by  Right Click  on any Column to Paste data in  "Bulk"  (as shown in below image) After   Paste  of Invoices through  Excel,  data can be  Viewed  as shown in below image Error Remarks  can be viewed at  Remarks  column ( while scrolling Right to the screen ) and at the left bottom of the window, as shown in below image Note:  Invalid Item code,Invalid CN No., Etc..   error remarks which occur during Import of GST Credit Note. For this type of error remarks you have to First  Create  all the Groups in software and Prepare Excel sheet according to  Import Format  provided   i n Software . After this You can Simply Paste the Excel Data without any error remarks *    Always

Trading A/c Help Guide

Image
 How to Check Trading A/C in Chanakya ERP Click on "Accounts" Click on "Trading A/C" A new window will popped-up with all your account balance detail like Purchase A/c, Direct Expenses, Direct Income, Gross Profit c/o, Sales A/c, Closing Stock You can check Trading A/c Consolidated and Date wise You can check Trading A/c  Detailed  and  Date wise You can check all your account details,  Select that account which you want to get details. Press "F12" Another window will popped up with all your account details. Again Press "F12" Again a new window will popped up with all your voucher wise detail  Now again if you want to check voucher wise entry detail then you have two option  again  Press "F12" to check bill in voucher mode and if you want to check Item wise bill detail again from Ledger window select voucher and  click "F11" again a new window will popped up with all your item wise invoice detail Note :- If you want to chec

Import B2B (Wholesale Bill) Invoices Help Guide

Image
How to Import B2B (Wholesale Bill) Invoices Through Excel in Chanakya ERP Import B2B (Wholesale Bill) Invoices  Click on  Import B2B Invoices  in  Master Menu  to open Import B2B Invoices option (as shown in below image) Invoices Maintained in  Excel  could be easily transferred through   "Copy and Paste"  option by  Right Click  on any Column to Paste data in  "Bulk"  (as shown in below image) After   Paste  of Invoices through  Excel,  data can be  Viewed  as shown in below image Error Remarks  can be viewed at  Remarks  column ( while scrolling Right to the screen ) and at the left bottom of the window, as shown in below image Note:  Invalid Item code,Invalid Billing Group, Etc..   error remarks which occur during Import of B2B Invoices. For this type of error remarks you have to First  Create  all the Groups in software and Prepare Excel sheet according to  Import Format  provided   i n Software . After this You can Simply Paste the Excel Data without any error