Posts

Showing posts with the label Vehicle

Chanakya ERP Update Release 1.1.3.2

Image
                Updates Released in New Version of Chanakya ERP 👉 " Money Receipt B2C in Vehicle" Segment has been Enabled 👉 " Supply to SEZ Unit" has been Enabled, You can enabled from Miscellaneous Setting       👉 And Many more Enhancement For More Query/Support, Call us on +91 8447740155 Thank You !

Chanakya ERP Update Release 1.1.2.9 - 1.1.3.1

Image
E-Invoice is Now Enabled For Vehicle Segment in Chanakya ERP 👉 Now Chanakya ERP is Enabled with E-Invoice Section in Vehicle Module 👉 E-Invoice in Sales Return is also Enabled (B2B and B2C Invoice) 👉 Many More Technical Updates has been Released Regarding Windows Compatibility For More Query/Support, Call us on +91 8447740155 Thank You !

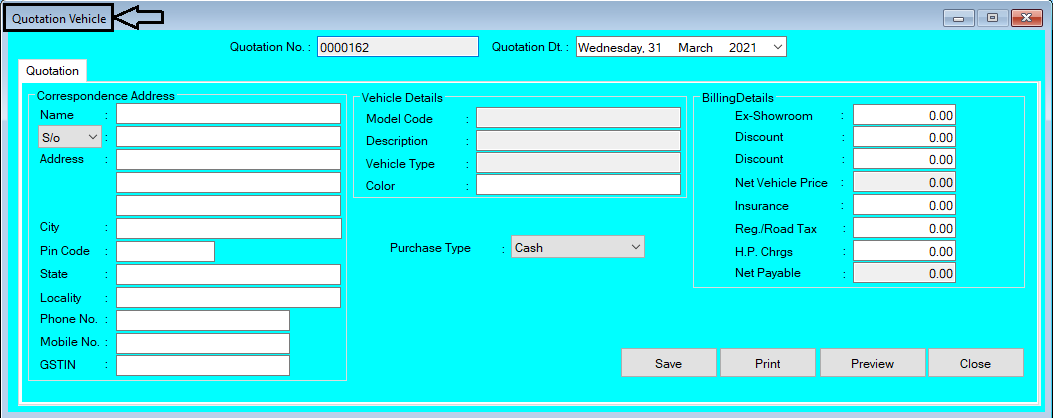
Quotation Vehicle Help Guide

Image
How to Create/Modify/Cancel Quotation of Vehicle Entry in Chanakya ERP Create Quotation Click  on  Inventory Vehicle Menu Click  on Quotation A new window will popped up In Open Window You will find the Correspondence Address of Party/Customers , where you have to take the full details from Party/Customers to fill here in the Address Box, as shown in below image In Next Part you can Fetch the details of Vehicle from its Model Code , Description , Vehicle type , Color and Billing Details Will Auto fetch By Pressing "F12" key on "Model Code" , all Vehicle List will be Opened, Select the Vehicle from List, It's Details will be automatically fetched Here you can Manually Enter the Color and Some Billing details like Discount , Insurance Charge , Reg/Road Tax and H.P Charges , as shown in below image Select Purchase Type "Cash" or "Finance" , as shown in below image Click on "Save" Button to Save the Quotation "Print" ...

Purchase Vehicle Entry Help Guide

Image
How to Create/Modify/Cancel Purchase Vehicle Entry in Chanakya ERP Create Purchase Vehicle Entry Click  on  Inventory Vehicle Menu Click  on  Purchase A new window will popped up Enter  Your  Purchase Date  -  (Current Date) Purchase Number  will be Created  (Automatically & Manual Setting in  Document Number Settings  option) Enter  Your  Invoice Date (Date at which Invoice was Created by Supplier),  as shown in below image In the Supplier Text box   Press "F12"  to  Select  Party/Supplier  details, or  Click  on  Three Dots   (...)  to view the  Party/Supplier  List, you can also  Click  on  Plus  Button  (+)  to  Create   Party/Supplier   Master , as shown in below image Again new window will popped up with all your supplier list Select Supplier All the basic detail of your supplier will be full filled ...

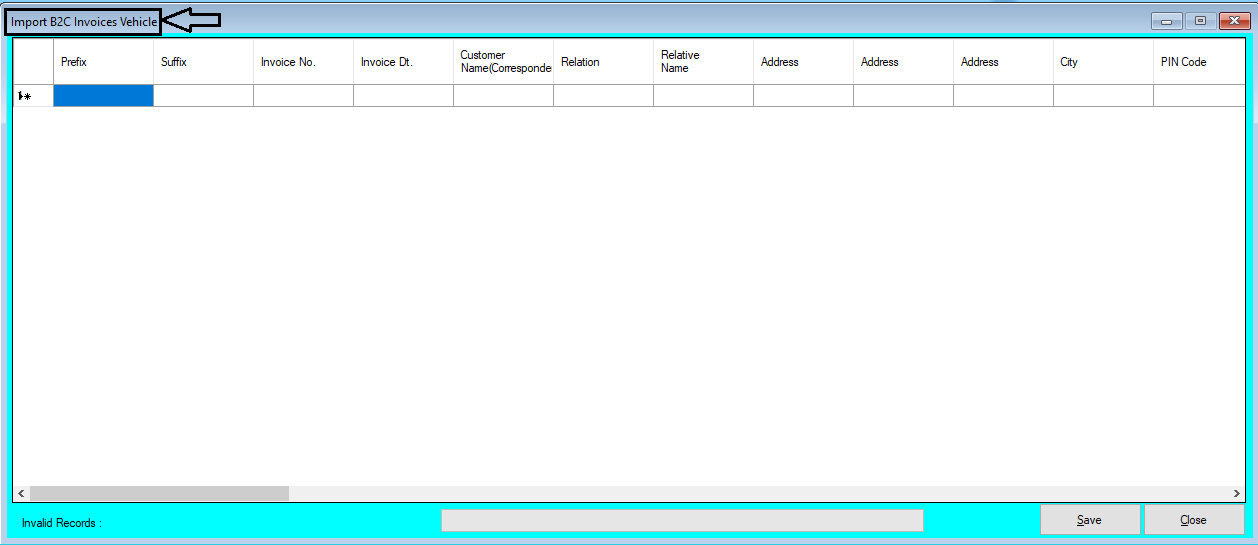
Import B2C (Retail Bill) Invoices Vehicle Help Guide

Image
How to Import B2C (Retail Bill) Invoices Vehicle Through Excel in Chanakya ERP Import B2C (Retail Bill) Invoices Vehicle Click on  Import B2C Invoices Vehicle   in  Master Menu  to open Import B2C Invoices Vehicle option (as shown in below image) Invoices Maintained in  Excel  could be easily transferred through   "Copy and Paste"  option by  Right Click  on any Column to Paste data in  "Bulk"  (as shown in below image) After   Paste  of Invoices through  Excel,  data can be  Viewed  as shown in below image Error Remarks  can be viewed at  Remarks  column ( while scrolling Right to the screen ) and at the left bottom of the window, as shown in below image Note:   Invalid Invoice No.,Invalid Frame No., Etc..   error remarks which Could occur during Import of B2C Invoices Vehicle. For this type of error remarks you have to First  Create  all the Group...

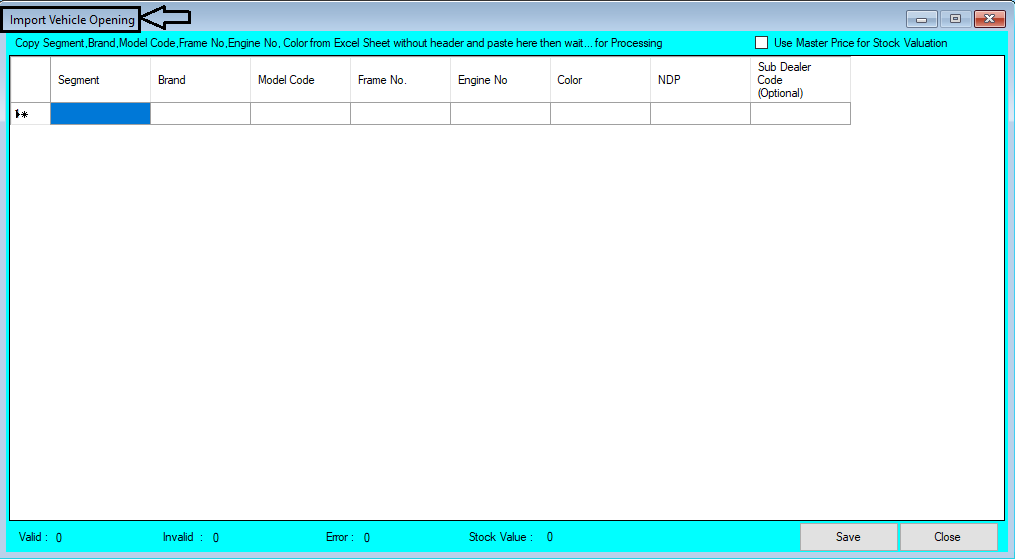
Import Vehicle Opening Help Guide

Image
How to Import Vehicle Opening Through Excel in Chanakya ERP   Import Vehicle Opening  Click on  Import Vehicle Opening  in  Master Menu  to open Import Vehicle Opening option (as shown in below image) Data Prepared in  Excel  could be easily transferred through   "Copy and Paste"  option by  Right Click  option on any Column to Paste data in  "Bulk"  (as shown in below image) After   Paste  of data through  Excel,  data can be  Viewed  in this window and  Data analysis  can also be Track at  Bottom  side of window  (as shown in below image) Opening Stock value can  be Updated according to Vehicle Master Price i.e., set during Vehicle Master Entry, simply view   Right Corner  of the open window to  Click  the  Check-Box  (as shown in below image) Error Records  can be check at  Remarks ...

Import Vehicle Master Help Guide

Image
How to Import Vehicle Master Through Excel in Chanakya ERP   Import Item Master Click on  Import Vehicle Master  in  Master Menu  to open Import Vehicle master option (as shown in below image) Data Prepared in  Excel  could be easily transferred through   "Copy and Paste"  option by  Right Click  option on any Column to  Paste  data in  "Bulk"  (as shown in below image) After   Paste  of data through  Excel,  data can be  Viewed  in this window and  Data analysis  can also be Track at  Bottom  side of window  (as shown in below image) Error Records  can be check at  Remarks  column ( while scrolling Right to the screen ), as shown in below image Note:  Invalid Value in Segment   and  Invalid GST Group  are common error which occur during import. For this type of error you can first  Create  these  Groups ...

Modify Vehicle Master List in Bulk like Excel Sheet Help Guide

Image
How to Modify Vehicle Master List in Chanakya ERP Modify Vehicle List (In Bulk) Click on  Modify Vehicle List  in  Master menu  to open Modify Vehicle list option (as shown in below image) Click  on any  Column/Row  which you want to  Edit  the  Information/Value  (as shown in below image) Every Information/Value is  Editable  with respect to Vehicle Master List. Any  Changes  here can be seen in Vehicle Master Menu and in whole software. Bulk  Vehicle List can be updated in  Single Window Click  on  Save  button. This message will be displayed.(as shown in below image)                                                                           ...