Posts

Showing posts from March, 2021

Import B2B Sales Return Invoices Help Guide

Image
How to Import B2B Sales Return Invoices Through Excel in Chanakya ERP Import B2B Sales Return Invoices  Click on  Import B2B Sales Return Invoices  in  Master Menu  to open Import B2B Sales Return Invoices option (as shown in below image) Invoices Maintained in  Excel  could be easily transferred through   "Copy and Paste"  option by  Right Click  on any Column to Paste data in  "Bulk"  (as shown in below image) After   Paste  of Invoices through  Excel,  data can be  Viewed  as shown in below image Error Remarks  can be viewed at  Remarks  column ( while scrolling Right to the screen ) and at the left bottom of the window, as shown in below image Note:   Invalid CN No., Invalid CN Date,Invalid Invalid Ref. Invoice Dt., Etc..    Error remarks which occur during Import of B2B Sales Return Invoices . For this type of Error Remarks you have to   Prepare Ex...

Kitchen Order Token (KOT) Help Guide

Image
How to Create/Modify/Cancel Kitchen Order Token (KOT) in Chanakya ERP Note: In Tools Section open  Misc.Settings  there Select Business Segment as "Restaurant" and Save it and Restart the Software (Logout & Login One Time) Then You will view Restaurant Segment Inside Software Create Kitchen Order Token (KOT) Click  on  Inventory Menu Click  on  Kitchen Order Token (KOT) A new window will popped up  KOT No . will be automatically fetched in software Press "F12" to Add Waiter details KOT Date and Timing will be fetched according to System Date & Timing Table wise KOT will be Prepared, Select Table No. on which Billing is to be Proceeded "Table Share Remark" is for Multiple KOT on Single Table, You can Add Some identification Remarks for Identifying the other Person on Same Table (Like Clothes Color, Hair Color, Etc.) You can also Add "Special Instructions" to Menu order during KOT Preparation and Your " Current KOT Value...

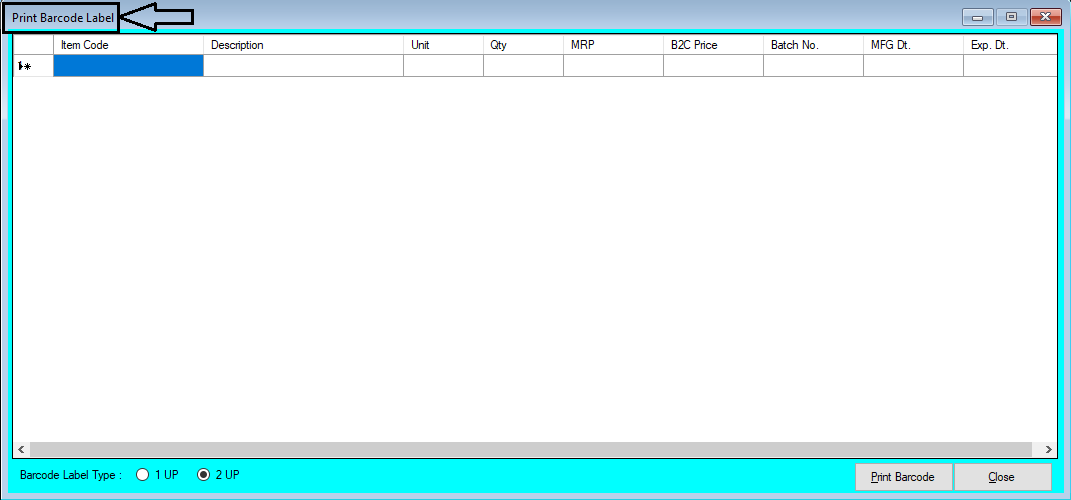
Print Barcode Label Help Guide

Image
How to Print Barcode Label (Rather than Purchase Bill Barcode Print) in Chanakya ERP Print Barcode Label Click on  Print Barcode Label  in  Inventory Menu  to open Print Barcode Label option (as shown in below image) On  Item Code   Enter Item First Digit  or  Enter (%)  and  Click  on  Enter  Button to  Open Select Item  Window in which you can Select Item, as shown in below image Double Click /  Select   Particular Item whose Barcode is to be Printed  Which Contain ( Itemcode ,  Description ,  Units ,  Quantity ,  MRP , B2C Rate, Batch No. ,  MFG Date , and  Expiry Date , Barcode Label Type (1 UP & 2 UP)  is viewed at  Bottom  of the Screen which is use to Select Barcode Label is single or Double Label Roll as shown in below image Click on Print Barcode button to Print Barcode of that Particular Item according to Quantity , as shown in belo...

Doctor Master Help Guide

Image
How to Create/Modify/Deactive Doctors Details in Chanakya ERP For Business Segment "Pharma/Medical" Section Note: In Tools Section open  Misc. Settings  there Select Business Segment as "Pharma" and Save it and Restart the Software (Logout & Login One Time) Create/Add New Doctors Click on  Doctor Master  in  Master  Menu to open Doctor Master option as shown in below image. Enter/select  appropriate  Information/Value  in field shown in above image. Description of each field is given below. Doctor Code   (*) : Enter an  unique code  for Doctor which you want to create like 1,2,3 or short form of Doctor Name etc. Doctor Name (*) : Enter the name of Doctor as their registered name. Address  : Enter address. City  :  Enter city name . Pin Code  : Enter 6 digit pin code. District  : Enter district name. State   (*) : Select correct state name.  Phone No.  : Enter Phone No. Mobile No. ...